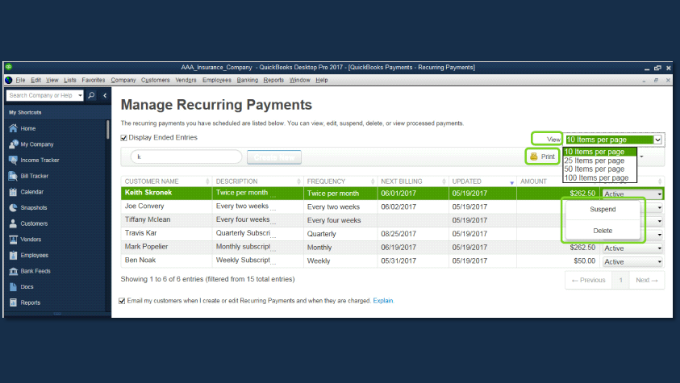
In the course of doing your business, there are various transactions that you repeat, daily, monthly, quarterly, or even year after for that matter. QuickBooks offers recurring transaction features, one which can save your time by making sure the entire process gets automated and these transactions don’t have to be input manually now and then.
Unfortunately, the Simple version doesn’t support the recurring transaction feature, and one can make use of it only in the Essential or Plus versions. So, doing business calls for using a higher version than merely a simple start which makes it easier for you to enjoy this feature. There are ways where you can record all the transactions effortlessly and automatically.
The Benefits of Recurring Transactions
To the transactions you repeat regularly, QuickBooks online recurring feature makes it easier for you to save time. Also, you save yourself from manually adding the transactions now and then, as it can be done with ease. Transactions can be many for example:
- The monthly fee for a consultation with your customer
- Other bills like Rent, telephone, utility, loan payments, bank interest,
- Monthly health insurance
So, when you try to set up the recurring transactions, there are about 3 types of templates that will come to your notice. These templates are Scheduled, Reminder, and Unscheduled. This divides your need properly and gives you a clear reason of which transaction is important, no so important, and which one needs a reminder.
What’s Scheduled, Unscheduled and Reminder or void a check in QuickBooks
Before we understand how to set up a recurring transaction, we must know what recurring templates are, their types, and how to go about it.
Scheduled
Scheduled templates are those which create a series of transaction as per the scheduled you have set up. If you wish to send them through email, it will be done accordingly.
Unscheduled
This type of template is where there is not much information or complete data. There is no action to the transactions until you choose it.
Reminder
This type of templates works based on a fixed schedule. The transaction won’t process until you decide and give permission to send them.
How to begin with the set-up of New Recurring Transaction Template
- Brace yourself:
Start by navigating to the Gear Icon, this can be seen at the top, followed by “Recurring transaction” which is mentioned under the List.
Once you click on the Recurring transaction, you will see a screen that displays a lit of recurring transactions if you have set up any previously. If this is the first time, you can easily generate a new recurring transaction template simply by clicking the “New” button right in front of you.
After clicking the new button, you will see a new screen popping on your screen.
- Transaction Types:
Moving on, there are multiple types of transactions that you want to add to the recurring features.
These transactions can be invoices, Bills, Expenses, and so on. It is your responsibility to make a smart decision and select a suitable transaction type, this can be done by clicking on the “Drop-down” button.
- Recurring Template:
Further, once the above steps are followed, you can make the recurring transaction template for all the transaction types like Bill, cheque, non-posting charge, non-posting credit, quote, deposit, journal entry, invoice, credit card credit, transfer, supplier credit, purchase order, refund, and expense.
Once done, click on the “Ok” option and you have saved the type and template till now.
Post clicking Ok, you will be navigated to a new screen that will mention or inform you to update and set up your template. You are required to fill in some basic details here.
- Template Name:
One most important step which needs accuracy is the Template name. It will help you remember the types of transactions in it easily. You can use a customer name, so you can quickly understand which customer Invoice is present in the recurring transaction type.
Now, you have to choose the type of template from the Dropdown that will appear. As discussed above, the type of transactions is Scheduled, Unscheduled, and Reminder.
- Month & Date
You can select the first day of every month and the start and end date.
- Payment Details
Make sure you choose the suitable payment method of your choice.
- Save
At last, the entire process and steps you have followed need to be securely saved. So, choose the “Save” template button.
Wrapping Up:
Make use of the recurring transaction feature and automate your entire process of transaction handling with ease. If you find out any difficulty closely observe each step mentioned here and redo it. These steps are very systematic and detailed, you will not have a problem setting up the recurring template. Enjoy the benefit of saving time, energy without having to learn the technicalities of accounts.


Leave a comment